Warning: this is a long read but you won’t regret it after all. 🙂
Tiramisu! the name by itself, always wanted me to want more of it.
A dessert of Italian origin since the 1970’s that won the world with its classical heavenly taste in less than a decade, is what can even modestly describe a Tiramisu in my experience of cake discoveries.
This Tiramisu cake trial has certainly been listed as one of my very own favorite makes.
So what makes a Tiramisu a Tiramisu? For the starters it is one of those desserts that are proudly and traditionally served cold, though not chilled and so known as a semifreddo. It is as you might know, a layered cake soaked in coffee liquor , sandwiched with whipped creams, and dusted with cocoa powder on the top and is prepared a day in advance. Easy to identify !
Originally Tiramisu cakes have been invented and prepared with a constant ingredient called mascarpone cheese and raw eggs. But Hello!, this is time to veganize and enjoy desserts like never before and that is exactly what has been attempted here, experimenting with the best ever vegan substitutes and I wish I could have saved my guests reviews and expressions over this (my discovery).
So to begin with the concept, all we need is to thorough with the concept and if your a happy cook, innovation is not at a mammoth’s task.:)
- for the base we need a cake that is cut into strips (fingers) and evenly spread in your dish.
- 1/2 cup of coffee liquor to soak the cake strips.
- spread a layer of the cream
- top it with another layer of cake fingers
- spread over another layer of cream and
- finally dust it with some raw cocoa powder. Taadaaa!
Time For My version of the Tiramisu Cake:
For the cake, I wanted to make two layers- one is the basic vanilla cake and the other is a plain chocolate cake. Relax! there is no need to panic. There is no overdo of cooking time or efforts. All you need is to split your batter into two portions- one remains as is and the other with the addition of cocoa powder. That simple.:)
The ingredient list for the cake-s
- 1 1/2 cup of all purpose flour
- 1/2 cup raw cocoa powder
- 1 cup sugar
- 1 tsp baking powder
- 1 tsp baking soda
- 1 tbsp white vinegar
- 1 tsp vanilla essence
- 1/4 cup vegetable oil
- 1/2 – 1 cup of water (@ room temperature)
To prepare:
- Preheat the oven to 180 C or 360 F
- Mix well all the dry ingredients apart from the cocoa powder, together in a bowl and divide this mix in two halves. You may either weigh the batter and divide or use your own eye judgement like what I dared to do.
- Incase you want just a single flavor, you can proceed as is, with 2 cups of flour and no cocoa powder at all and prepare a vanilla flavored sponge cake.
- Going back to pt.1, for the all the wet/liquid ingredients, follow the same theory and add half the quantity of it, individually each, to the two bowls of mixture. All you need to keep in mind is, it’s the same cake you make. Just that the batter has been split in two parts.
- Pour the batter in two different greased and flour dusted baking pans.
- Now put the pans in your oven and set the timer for 30 mins and at a go you have two separate cakes being baked for you, together and at once. 🙂
- Remove the pans from the oven once your toothpick come out clean and allow it cool before you begin to cut them into strips or cake fingers.
For the whipped Cream-s:
Similar to the choice of using two different classic flavors of cake, I also did choose to make two kinds of the classic creams that would sandwich this cake- vanilla and chocolate. 🙂
Vanilla Whipped Cream
- Traditionally for vegan whipped creams, we use the canned coconut cream and so has been done. Make sure you buy a can of the full fat coconut cream can, available at the Asian food section aisles.
- To replace and add the essence of the mascarpone cheese, I added some Tofu, say half of a 250 gram packet.
- 1 tsp of vanilla essence.
- 1 tbsp of Agave nectar or sugar as you may please.
- First add the drained tofu pieces in a blender and make a smooth paste.
- Whip gently the coconut cream that you just retrieved from your can with your whipper and then add the above blended tofu, vanilla essence and agave nectar/sugar into it and in no time you see your whipped cream being delightfully born.
- Put this cream back to the refrigerator to cool down before the coconut starts to loose its water.
Chocolate Ganache/whipped Cream
- You would need half a brick of a vegan dark chocolate that has been melted in a microwave safe bowl or melted over a double water boiler. Whichever is easier for you.
- 1/4 cup soy milk and 1/2 tsp of oil mix in the melted chocolate to prepare the ganache.
For the chocolate whipped cream :
- 2 riped avocado. Yes, you heard that right. An avocado can make you the most creamy, delicious and tempting, chocolate whipped creams and chocolate mousse.
- 3 Tbsp cocoa powder
- 1 tsp of vanilla essence
- 1/4 cup of agave nectar
- 1/4 cup soy milk
To make, mash the avocado until creamy, add the cocoa powder, the vanilla essence and sweetener along with soy or any other non diary milk and whip on high speed and your chocolate whipped cream is ready.This is how simple it is make!
Time to Set the Final Cake
- Cut the vanilla cake into strips/ fingers and set it at the base of the dish so as to fill the base completely.
- Pour 1/2 cup of the coffee liquor (room temperature) over the cake fingers to soak them well.
- Now to alternate the taste, I spread a layer of the chocolate whipped cream over the soaked vanilla cake.
- The next layer would be that of the chocolate cake fingers, topped with the vanilla whipped cream.
- Post this I put my dish back in the fridge to cool a bit more so that I do not mess the creams.
- For me, the top has to be a layer of chocolate and so it was. The final top coat of this cake was the chocolate whipped cream along with the ganache from the melted chocolate brick. You could also choose for a full chocolate ganache coating. I admit this sounds like some effort but trust me, every bit of it, is worth it.
- Finally you reach the end, when you know its time to dust the top with some cocoa powder and your good.
- Set the dish for the cooling in the refrigerator. Ideally this cake needs to be prepared a day or night in advance.
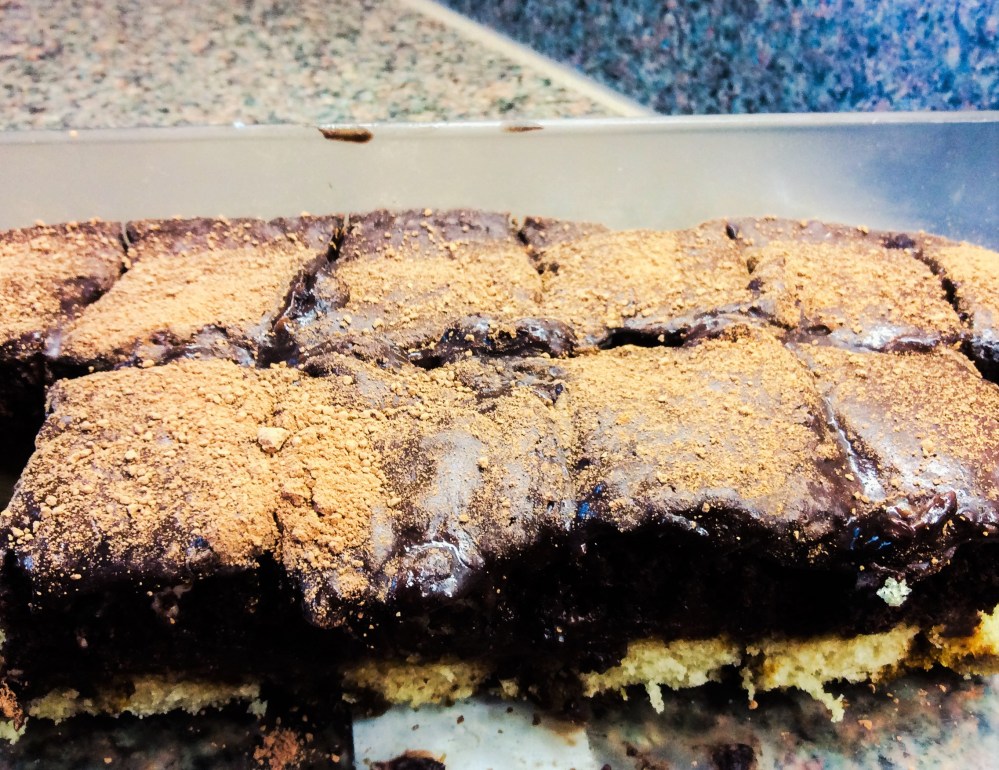
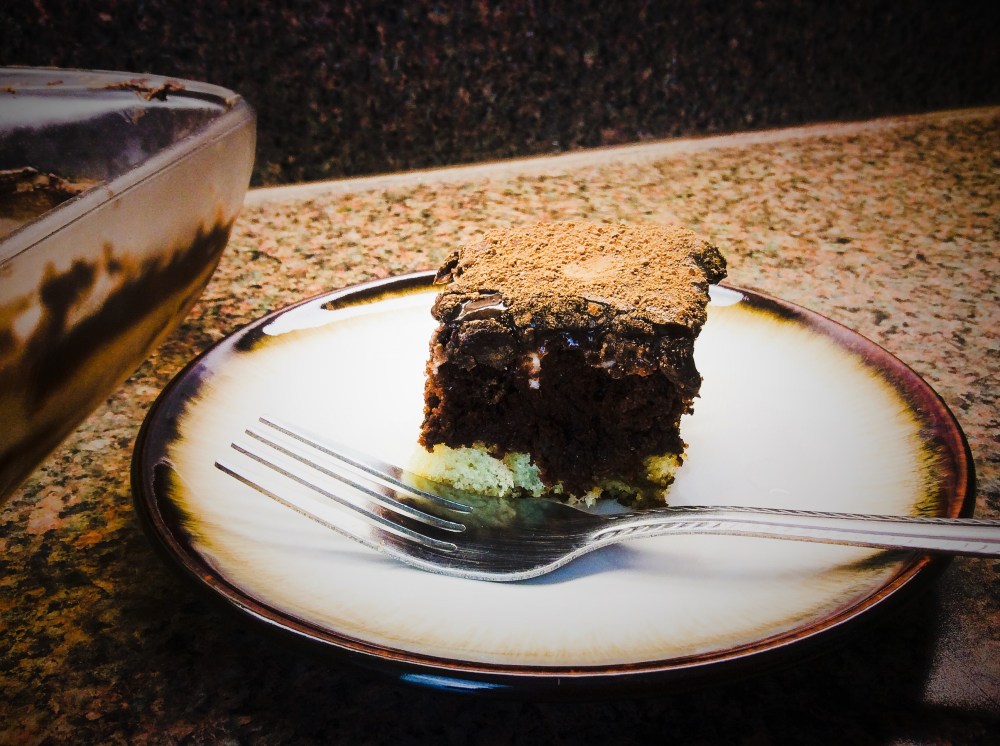 Dinner over? Time to serve some dessert? There you go ! cut the cake into small squares and serve it cold to your guest and enjoy the expression.
At the end of the day, this is your reward as a cook, as a baker, as a foodie and as a host. 🙂 Enjoy!
P.S: Phew! this was indeed a long blog and a long read, but its totally worth a try. Thanks a bunch for hanging till the end. Your views and comments would be equally worthy to me as it was for the cake. 🙂

This looks delicious! Hope you can accept this nomination – https://thegreeninja.wordpress.com/2016/07/20/sunshine-blogger-award/
😊
LikeLiked by 1 person
Thank you so much Priya, for the appreciation and for the nomination both. 🙂 has made my evening so exciting as this is the first nomination I get. :D. I humbly accept the nomination and the post will be up tomorrow for sure. 🙂
LikeLiked by 1 person
😊 Look forward to it!
LikeLike
Wow
LikeLiked by 1 person
Does that ever look amazing! 🙂
LikeLiked by 1 person
😍
LikeLike
I never use my oven, but will consider making this!
LikeLike
Hahah..yes u should use the oven..😉
LikeLiked by 1 person